Working with Alarm History
When the monitoring BOOL variable turns ON (or OFF depending on your setting preference), or when alarm data is written to the monitoring variable, the alarms are listed together with its trigger date/time.
Example Operation
Setting Workflow
Add Variables
Project Explorer : [Variables] ➞ [All Variables]
Add the following variables.
Variables properties :
| [Name] | [Data Type] |
Var1 |
[BOOL] |
Var2 |
[INT] |
Add Alarm Groups
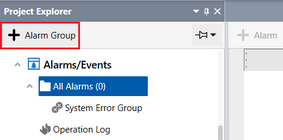
Project Explorer : [Alarm/Events] ➞ [All Alarms]
Add the following alarm group.
Alarm Group (Name : AlarmGroup1) properties :
Initial Value
Add Alarms
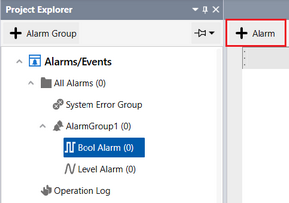
Project Explorer : [AlarmGroup1] ➞ [Bool Alarm]
Add the following Bool alarm.
Bool Alarm properties :
| Row | Tab | Property | Value |
| 1 | [Basic] | [Alarm Type] | [HiHi] |
| [Trigger Condition] |  |
||
| [Variable] |  [Variable]
[Name]: Var1 [Variable]
[Name]: Var1 |
||
| [Message] | Pressure abnormality. |
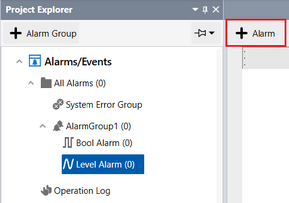
Project Explorer : [AlarmGroup1] ➞ [Level Alarm]
Add the following Level alarm.
Level Alarm properties :
| Row | Tab | Property | Value |
| 1 | [Basic] | [Message] | Temperature abnormality. |
| [Alarm Type] | [Hi] | ||
| [Value] | 80 | ||
| [Deadband] | 0 | ||
| [Variable] | [Variable]
[Name]: Var2 |
Set up Parts
Project Explorer : [Screen Design] ➞ [Screens] ➞ [Screen1]
Drag and drop the following objects from the [Tool Chest] to the screen.
![[Tool Chest]](../img/pf_loc_pop_scr_part.png)
Alarm Summary object (Name: AlarmSummary1) properties : A-1
| Tab | Sub Tab | Property | Value | |
[Function] |
[Basic] |
[Alarm Group] |
AlarmGroup1 |
|
[Sort] |
[Column] | [Date] | ||
| [Order] | [DESC] | |||