In the [Project] menu, select [System Settings] and then select [Display Unit]. Open the [System Area] tab.
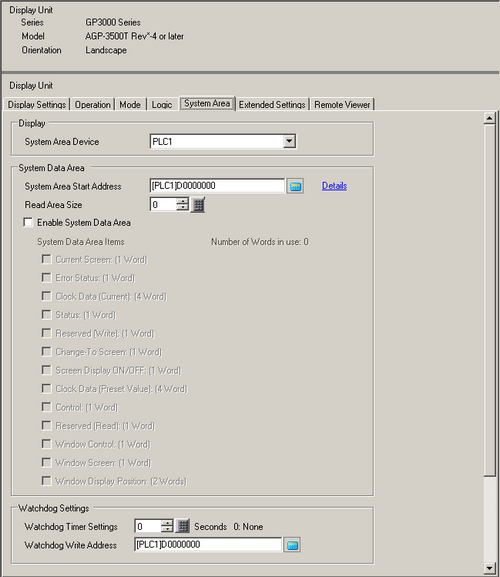
Select which device/PLC to allocate the system data area in [System Area Device]. The system data area can only be set to one device/PLC.
Designate the start address of the system area in [System Area Start Address] and select the [Enable System Data Area] check box. (For example, D00000)
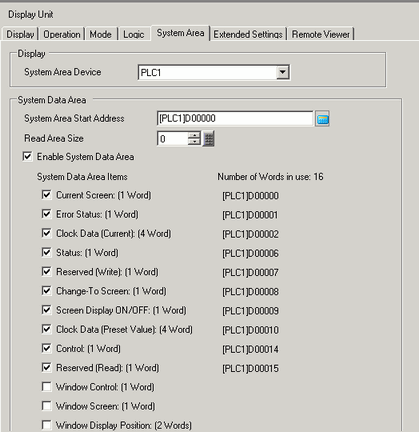
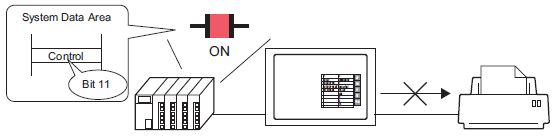
Select the [Control: (1 Word)] check box.
If you turn ON Bit 11 in the address that displays on the right side ('D00014' in the above example), printing will be canceled.

![]()
[Control: (1 Word)] address Bit 11 does not automatically turn OFF. While Bit 11 is ON, none of the print features will operate. Be sure to turn it OFF after canceling the print.