
-
When using a model without a display portion, attach a display module.
-
This function is not available on the GPH6000 Series, SP5000 Series Open Box, or IPC Series.
If a project file cannot be transferred, you can force the display unit into transfer mode (waiting to receive project).
When using a model without a display portion, attach a display module.
This function is not available on the GPH6000 Series, SP5000 Series Open Box, or IPC Series.
For the GP6000 Series and ST6000 2nd Gen Series
Within 15 seconds of turning on the display unit, or immediately after the startup screen (splash screen) disappears, repeatedly tap the bottom left or bottom right corner of the screen.
System Settings opens.
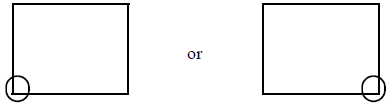
For information about the System Settings, refer to the hardware manual for the display unit.
From the menu, select [System] - [Recovery].
Touch the [Execute] button.
The display unit is restarted. The forced transfer screen appears immediately after restart.
Transfer the project files from GP-Pro EX.
Automatic IP address lookup is not available when transferring data over Ethernet. Click [Add] on the [Select Display Unit] dialog box that appears during the transfer and input the IP address of the display unit.
When using SP5000 Series (excluding Open Box), GP4000 Series, LT4000 Series, ET6000 Series, ST6000 Series (except for the 2nd Gen), STM6000 Series or STC6000 Series
When the power is turned on, continue touching the bottom left corner or the bottom right corner of the panel (within a 40 pixel area).
When the following dialog box appears, transfer project files from GP-Pro EX.
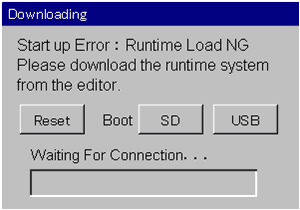
To forcibly transfer project files on a SP5000 Series unit (excluding Open Box) over Ethernet, use the LAN1 (Ethernet1) port. When the above dialog box appears, you cannot transfer using the LAN2 port.
When using external storage on SP5000 Series (excluding Open Box), GP4000 Series, LT4000 Series, ET6000 Series , ST6000 Series (except for the 2nd Gen), STM6000 Series or STC6000 Series
To forcibly transfer project files using external storage, from the [Memory Loader]'s [Transfer Tool] command, select [Create Backup File].
For the steps on how to create backup data, see the following.
 34.8.1 Transfer - Transferring Project Files from PC to Display Unit
When the power is turned on, continue touching the bottom left corner or the bottom right corner of the panel (within a 40 pixel area).
When the following dialog box appears, touch [SD] or [USB].
This will restart the display unit and launch the Memory Loader tool. Touch [Download] on the following screen.
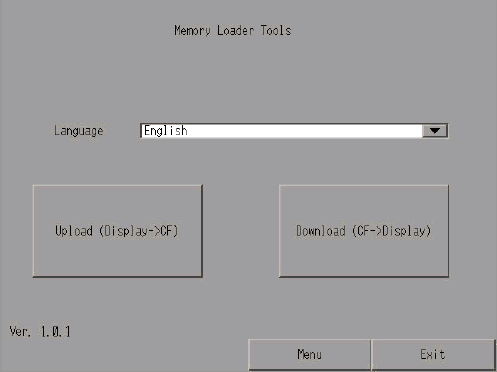
Select the file you want to transfer and touch [Start]. (If there is a password for transferring, input the password first, then touch [Start].)
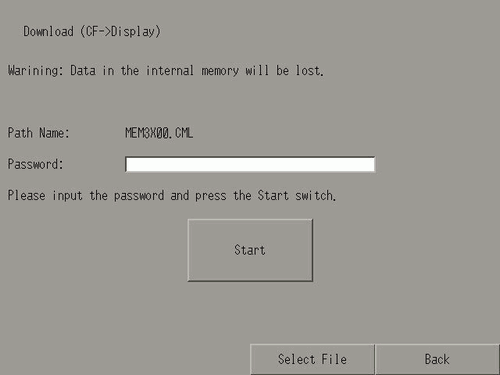
After transfer is complete, the display unit restarts and the screen of the transferred project file is displayed.