Displaying Windows
Like a window, you can load content onto the screen. Touch the switch to display the content. Touch the switch again to close the content.
Example Operation
Setting Workflow
Add Variables
Project Explorer: [Variables] ➞ [All Variables]
Add the following variables.
Variables properties:
| [Name] | [Data Type] |
Var1 |
[BOOL] |
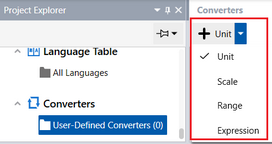
Add Converters
Project Explorer : [Converters] ➞ [User-Defined Converters]
Add the following converter.
| [Name] | [Type] |
Converter1 |
[Range] |
Converters (Name : Converter1) properties :
| Tab | Property | Value | ||
| [Basic] | [Data Type (Source)] | [Boolean] | ||
[Data Type (Result)] |
[Numeric] | |||
[Range] |
2 | |||
[Range1] |
[Data (Input)] |
[False] | ||
[Operator] |
[==] | |||
[Data (Output)] |
1 | |||
[Else Condition] |
[Data (Output)] |
0 | ||
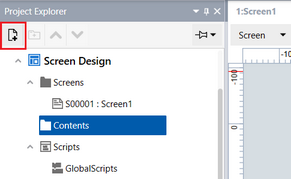
Set up Contents Screen
Project Explorer : [Screen Design] ➞ [Contents]
Add the following content.
Content1 properties :
Default value
Define the Settings of Contents
Project Explorer : [Content1]
To define content settings such as size and color, in Document view, click the drawing area and define the settings in the Properties window.
Content1 properties :
Tab |
Property |
Values |
|
[Basic] |
[Fill] |
[Value] |
ID: (Any) |
Set up Parts
Project Explorer : [Screen Design] ➞ [Screens] ➞ [Screen1]
Drag and drop the following objects from the [Tool Chest] to the screen.
![[Tool Chest]](../img/pf_loc_pop_scr_part.png)
You can change the layered order of objects in the [Object List].
Toggle Switch object (Name: ToggleSwitch1) properties :
| Tab | Sub Tab | Property | Value |
[Function] |
[Basic] |
[Current Value] |
 [Variable]
[Name]: Var1 [Variable]
[Name]: Var1 |
Content Display object (Name: ContentDisplay1) properties :
| Tab | Sub Tab | Property | Value | |
[Function] |
[Basic] |
[Content ID] |
1 | |
| [Shape] | [Size/Location] | [Visibility] | [Variable]
[Name]: Var1 |
|
| [Converter] | ||||
| [Direction] | [OneWay] | |||
| [Converter] |  [Converter1]
 |
|||