Configuring Pro-face Connect
When you want to display or operate on a personal computer or tablet, the screens of display units in remote locations, you need a system that can prevent unauthorized access from external sources.
With Pro-face Connect serving the role of router, as long as you have an Internet connection, you can construct such a system.
Pro-face Connect is structured to connect display units on the work site (SiteManager), with computers or tablets in the office (LinkManager), over a server (GateManager).
-
For information on the models which support the Pro-face Connect, see the following.
Supported Model/Feature -
For more details on Pro-face Connect Configuration, refer Pro-face Connect Manual.
Required Setup
You need to set up SiteManager, LinkManager, and GateManager.
SiteManager
Use SiteManager Embedded to register the display unit as SiteManager.
LinkManager and GateManager
You can set up LinkManager and GateManager from your browser.
For more information, refer to Pro-face Connect Manual.
SiteManager Settings
The setup method for SiteManager differs depending on your model.
When Using Models Other Than the SP5000 Series Open Box (Windows 10 IoT Enterprise Model), the IPC Series, PC/AT, or the GP-4100 Series
This procedure is for models where the SiteManager settings are configured in the display unit’s Hardware Configuration.
- Open the Hardware Configuration screen.
-
In the [Pro-face Connect] field, touch [Enable] and then touch the [...] button at the right side.
→ A window with Pro-face Connect is displayed.
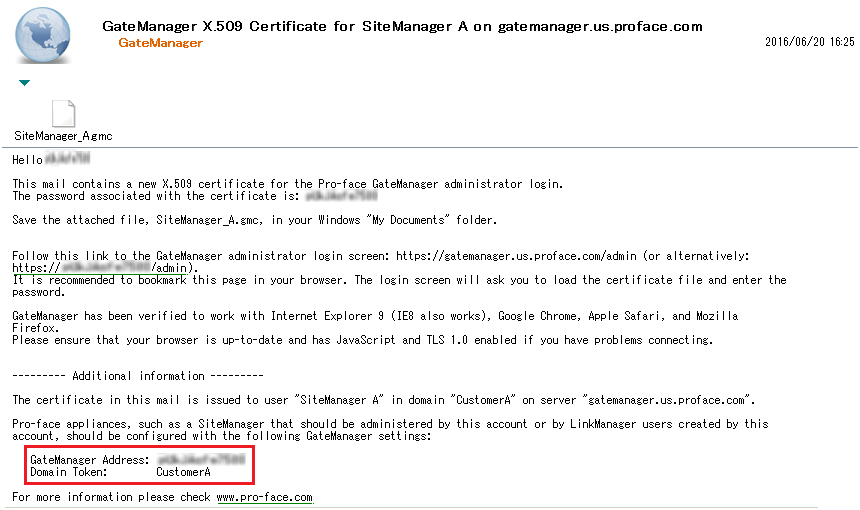
- Enter the GateManager IP address, Domain Token for connection, and SiteManager appliance name.
The defined SiteManager appliance name displays on the GateManager.The information required in this screen is found in the lower section of the e-mail you received from the GateManager with the GateManager X.509 Certificate.
- If necessary, confirm the proxy server IP address from your network administrator and enter it in the [Web-proxy Address] field.
A Web-Proxy is often used to validate Internet access. SiteManager is designed to access the Internet and the GateManager via a Web-Proxy. Set up the Web proxy settings in the [Web-proxy Address] field.
- Touch the [Apply Changes] button. The changes are saved and the SiteManager restarts.
When Using ST6000 2nd Gen Series
This procedure is for models that support configuring the SiteManager settings in the display unit's [System Settings].
- Open the Hardware Configuration screen.
- Touch the [Reboot and show System Settings] button to open the [System Settings].
- Configure the settings in [SiteManager].
For information on how to configure these settings, refer to the hardware manual.
When Using SP5000 Series Open Box (Windows 10 IoT Enterprise Model) or IPC Series
This procedure is for models that support configuring the SiteManager settings in a browser.
If SiteManager Embedded is not pre-installed on your SP5000 Series Open Box (Windows 10 IoT Enterprise Model) or IPC Series device, download and install the latest update module from our support site https://www.pro-face.com/trans/en/manual/1001.html.
- To start setting up SiteManager Embedded, turn off the write filter.
- From the Windows [Start] menu, click [Pro-face] - [SiteManager Embedded] - [Start SiteManager Embedded].
- In the SiteManager Embedded web site, from the [GateManager] setting click the [Fix] button.
- Enter the IP address of the GateManager to [GateManager Address], the connection password to [Domain Token], and the SiteManager name to [Appliance Name]. The defined SiteManager name appears on the GateManager.
The information required in this screen is found in the lower section of the e-mail you received from the GateManager with the GateManager X.509 Certificate.
- If necessary, confirm the IP address of the proxy server with the network administrator, and enter it in the [Web-proxy Address] field
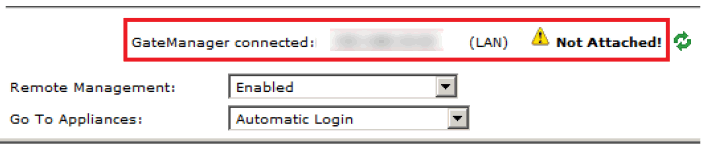
- Click [Save] and [Connect]. To check the connection status with GateManager, click the [Refresh]
 icon.
icon.
Connection to the GateManager is possible if the GateManager Administrator has allowed access.
- After a short while the status should change to this:
- SiteManager Embedded set up is now complete and the display unit is ready. Once the display unit is connected to a network with Internet access, SiteManager Embedded automatically connects to the GateManager.